Individual Profile Layouts
A profile layout is a representation of fields that will be presented to the user during the ordering process. The profile layout is how Administrators can prompt the user for different fields based on the Catalog Item the user is ordering.
Profile Layout Setup Mode
Below is a screenshot of a Profile Layout page. Administrators can manipulate the contents of the page to satisfied the business needs. Configuration of a Profile Layout is covered in detail in the Profile Layout Configuration section.
Non Admin view of the Profile Layout
Once a Profile layout page is configured, below we can see how it will look to users during the ordering process. configuration of a Profile Layout is covered in detail in the Profile Layout Configuration section.
Personalized Catalog Items and User Profiles
Catalog Items can be configured to require a User profile during the ordering process. If this is enabled, whenever a user orders a Personalized Catalog Item, the user will be directed to the Profile page.
Profile Layout Entitlements
The following entitlements are required to use the Profile Layouts feature:
-
ProfileLayout_Add: Required to create a new profile layout.
-
ProfileLayout_Delete: Required to delete a profile layout.
-
ProfileLayout_Edit: Required to edit a profile Layout. This includes clicking "Edit" in the Profile Layout view and clicking on a row in the Profile Layout view to edit.
-
ProfileLayout_View: Required to access the User Management >> Profile Layouts view.
Access Profile Layout
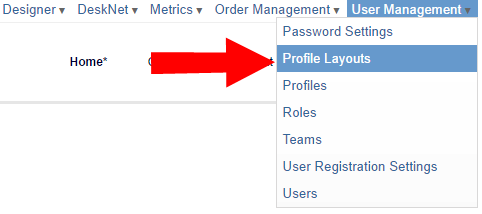
Click on the User Management then Profile Layouts menu option.
Create Profile Layout
Click the "Create Profile Layout" button located on the Profile Layouts page.
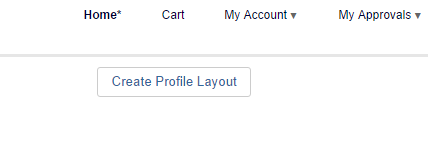
The Create Profile Layout screen will appear.
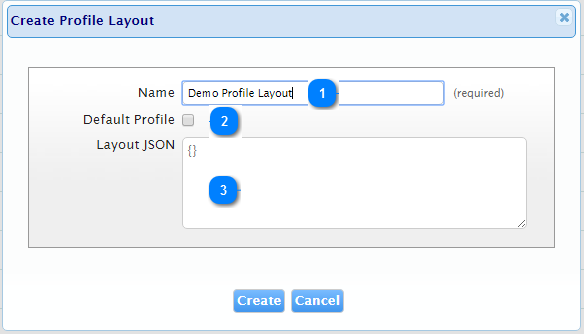
| # | Field | Description |
| 1 | Name | Enter the name you wish to call the Profile Layout. |
| 2 | Default Profile |
Check this option to make the profile layout you created the default" option. Note: There can only ever be one Default profile at a time. This means that enabling a default profile will disable any other Profile Layouts currently marked as Default. It is recommended that you not make a new profile layout the default one until after you have configured its fields. |
| 3 | Layout JSON |
This field accepts a valid JSON string. Note: If you are not familiar with what value to enter here, then it should be left empty. |
Profile Layout Editing
There are two ways to edit a profile:
- Clicking on the Edit Icon
- Or clicking on the Row of the Profile Layout you wish to Edit.
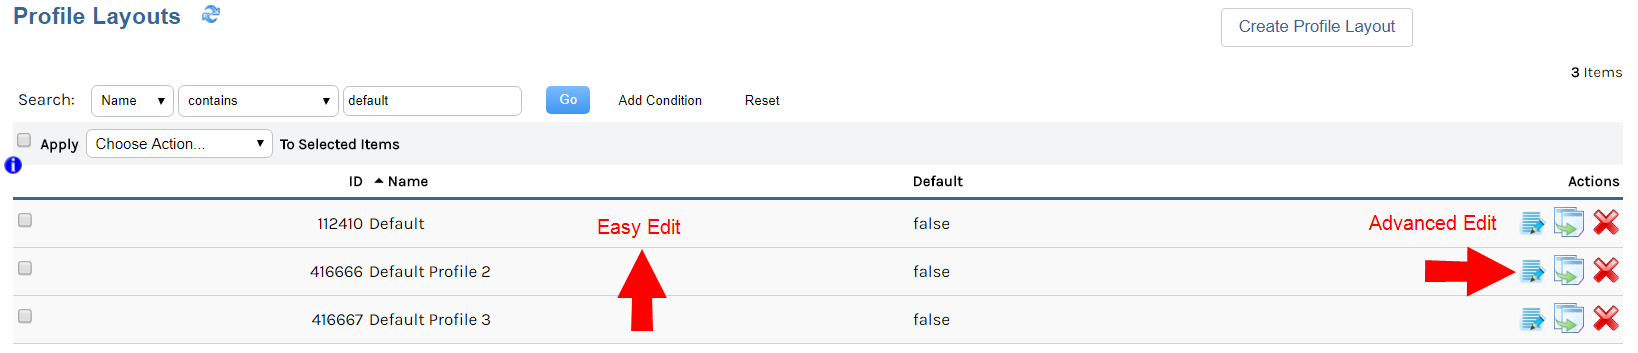
Advanced Profile Layout Editing
For users familiar with JSON, clicking the “edit” icon to enter advanced Editing mode may be preferable.
This will present you with the same form as defined in the Create Profile Layout section.
Profile Layout Configuration
For less advanced users, configuring a Profile Layout through the browser is recommended. This is done
by clicking on the row of the Profile Layout you wish to edit.
First Time Individual Profile Layout Configuration
The first time you click on a row to edit the configuration, you are presented with a screen that should
looks like the image in screenshot below.
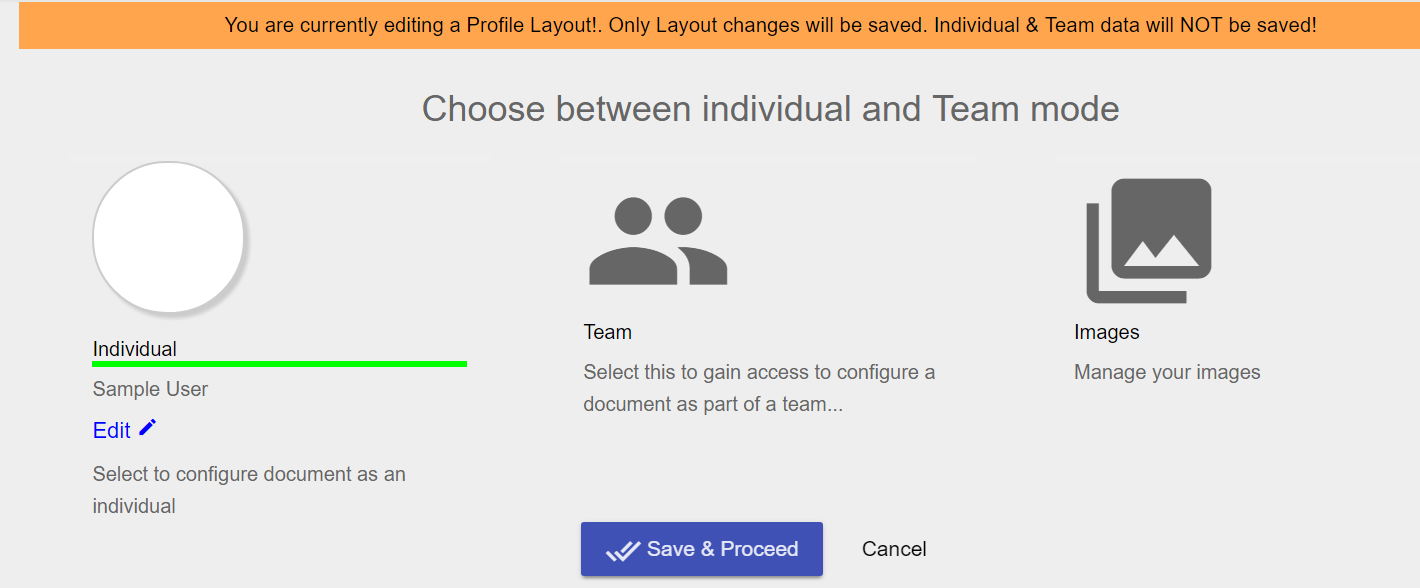
This is normal, since this Layout was just created, it doesn’t yet have any fields in it. Let’s add some fields.
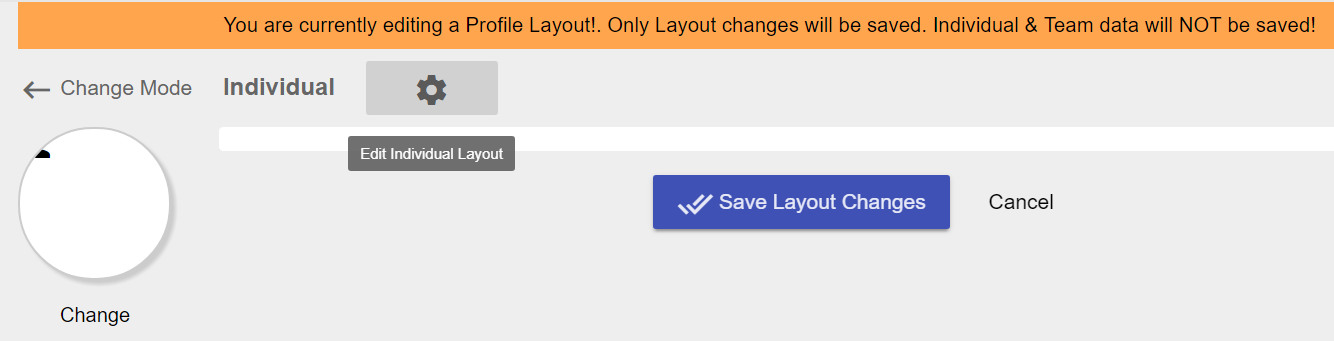
Edit Individual Profile Layout
Click the "Edit" icon under the Individual option to load the profile layout page. Here you will add fields to the profile layout as captured in the next section.
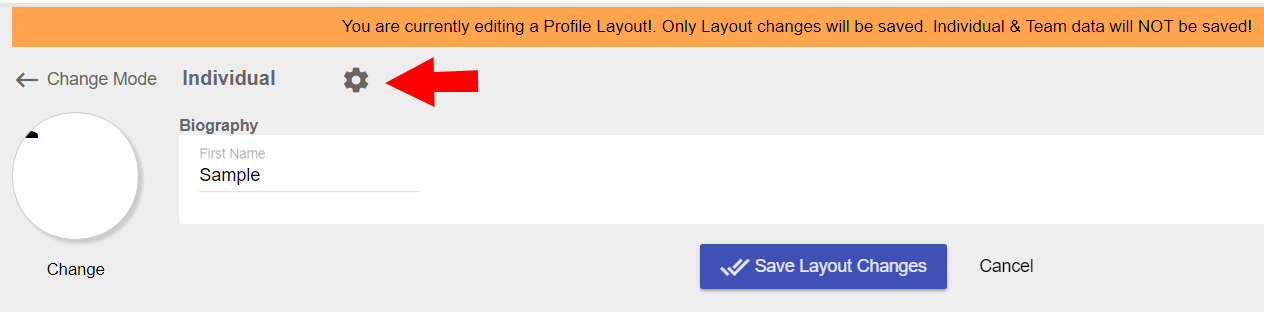
Adding Fields to our Profile Layout
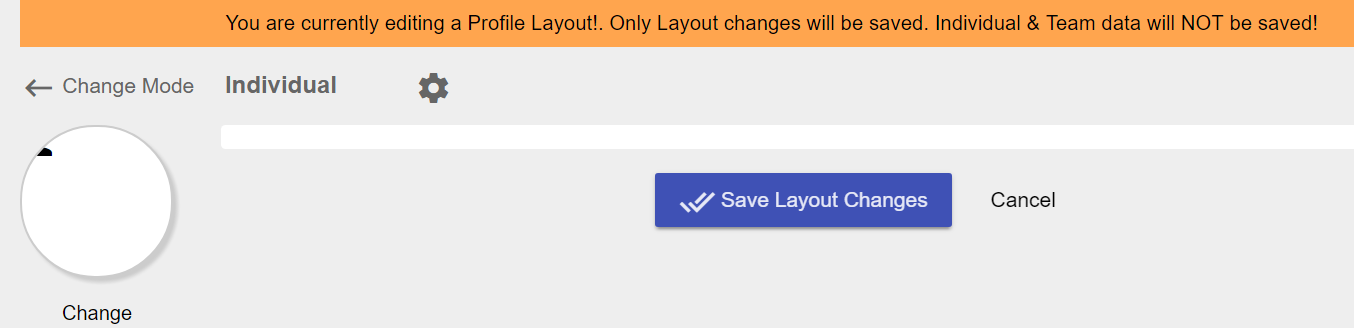
As the screen indicates that the Profile Layout is being edited, click the gear icon on this page to add fields to the profile layout.
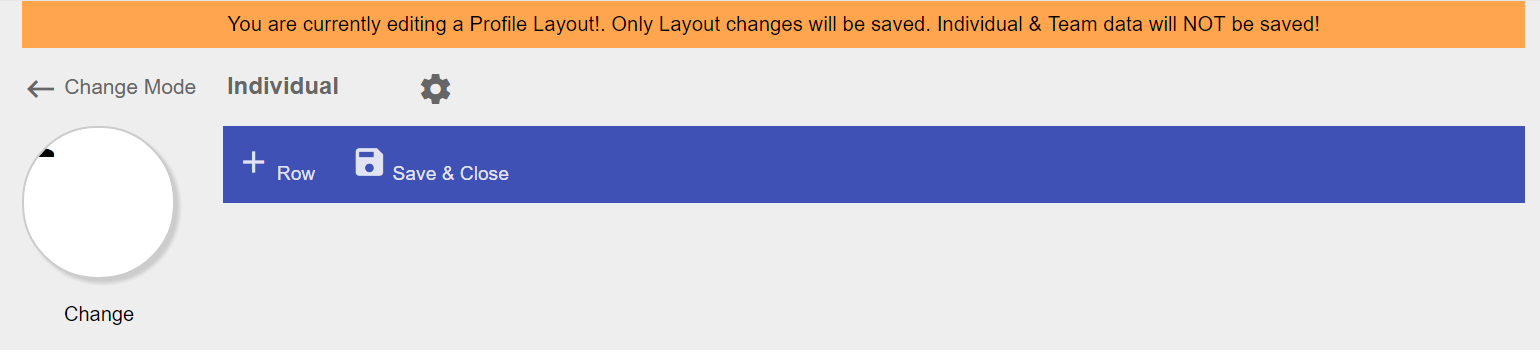
Once clicked, you should now see some additional options available to you.
Adding Rows to our Profile Layout
The profile Layout is a grid based system. This means that before we can add our field, we must first add
a row by clicking “+ Row” as indicated below.
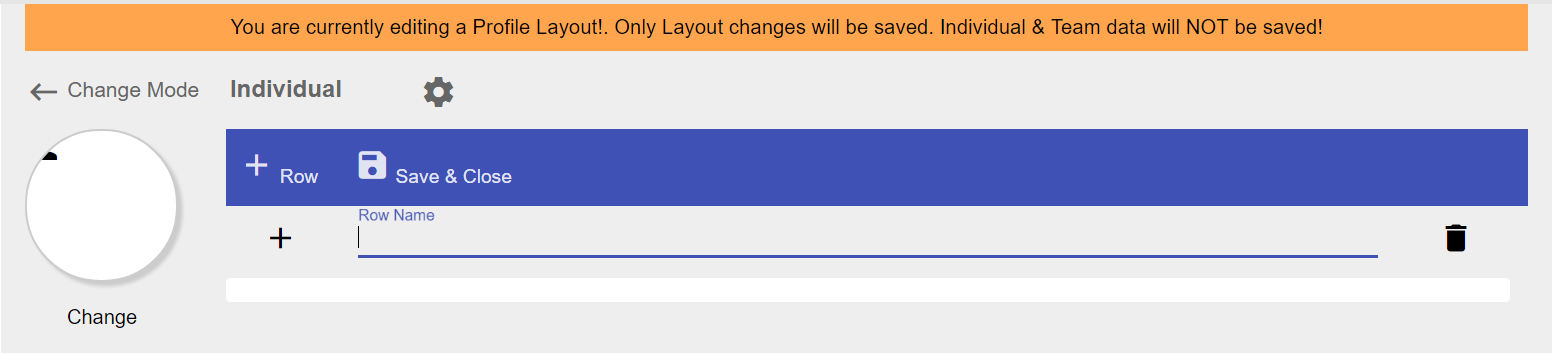
Once you have added a row, you will see a secondary option prompt you to add a field the following section.
Adding Fields to Rows in our Profile Layout
To add Fields to the profile Layout, you must first have at least a single row. Once a row has been added,
you will see additional options for adding Fields. As indicated below.
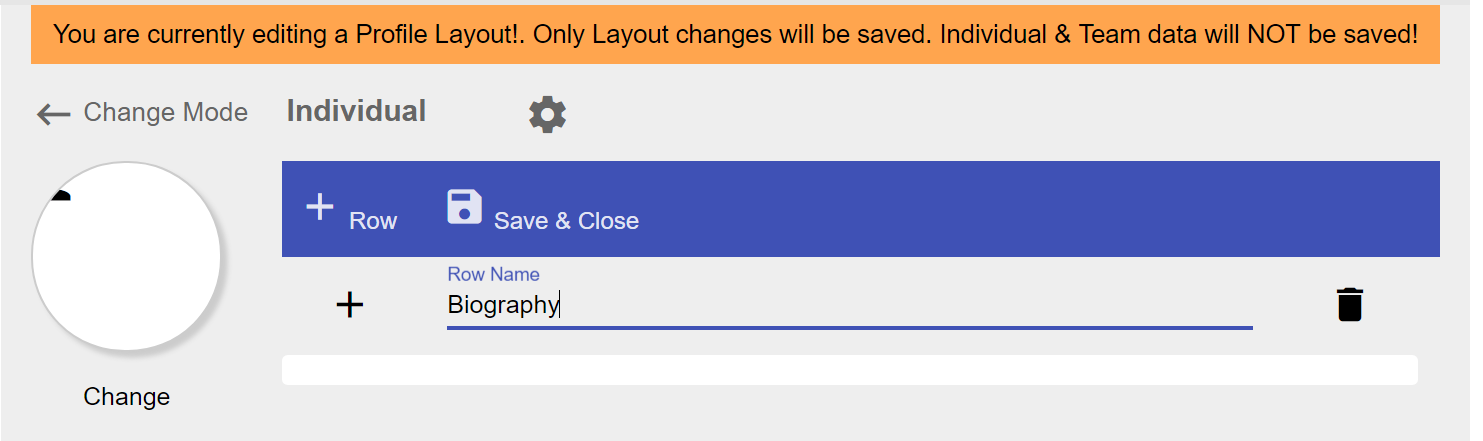
Mapping a field to a Data Model
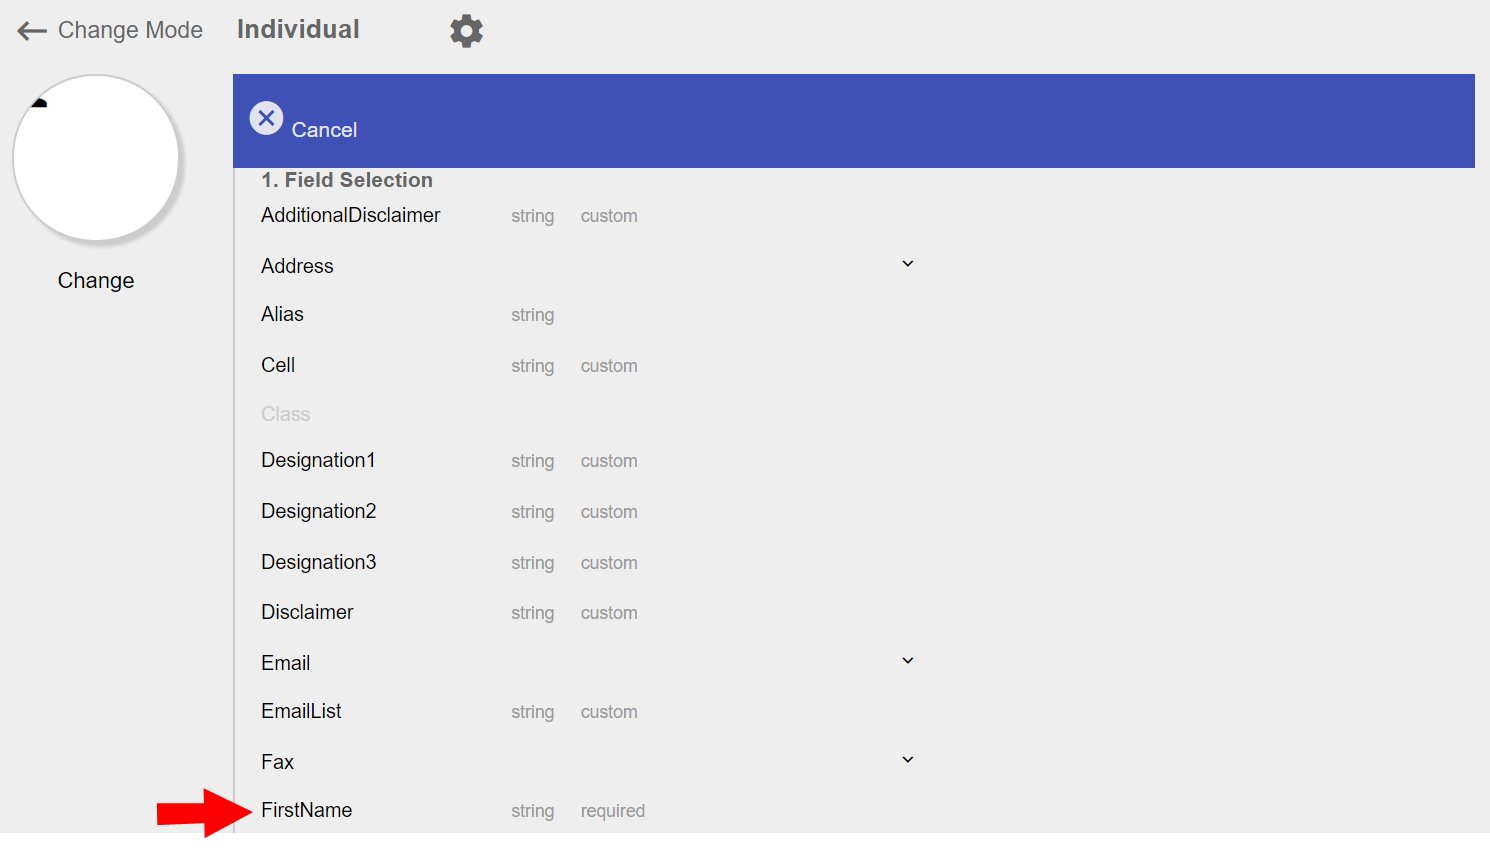
You must map your field so that the system will know how to both pre-populate and save the data that is entered. First enter the name of the field and then hit the Enter key.
- Choose “First Name” as the field you wish to map
- Choosing a field will enable a second panel where you configure the specifics of the field. As described in the next section.
Configuring the Prompt Type
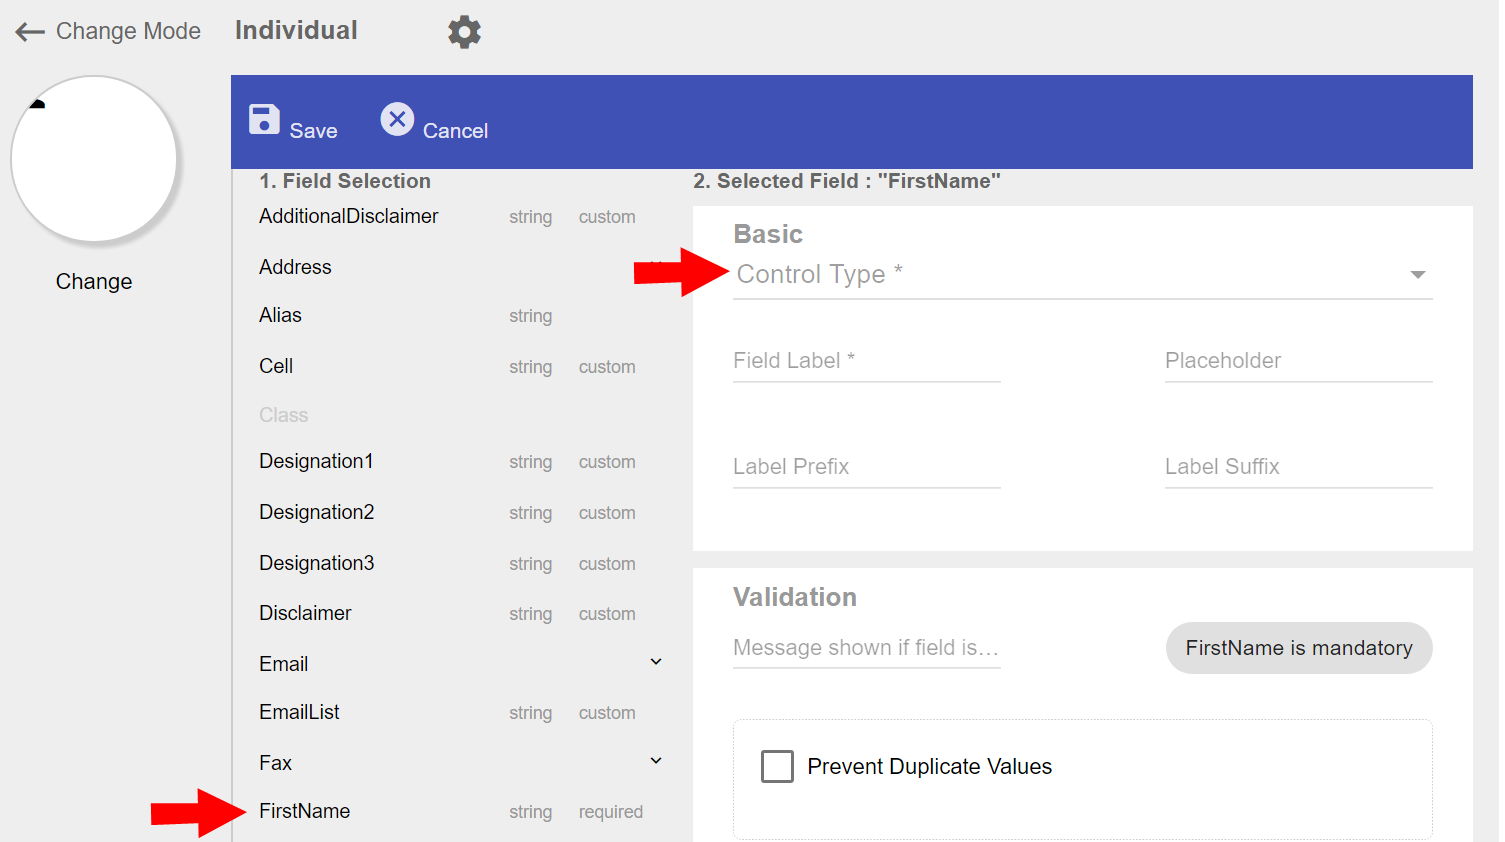
Once you’ve selected a field, you must now configure how the end user will interact with the form. Each
field you add represents a prompt in a form the user will be able to modify during the ordering process.
Here we selected “First Name”, and we are displayed with choosing the "Control Type" we want to
present to the end user.
The control Type offers you the option of the following types of controls:
- Text
- Drop Down
- Rich Text
- Number
- Text Area
- CheckBox
Each configuration come with its own set of additional options. As such, you must first choose the type of control.
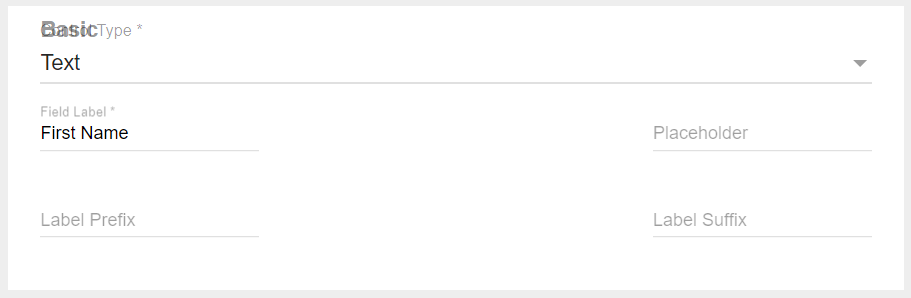
For now, let’s choose a “Text” control type and Field Label is "First Name". When we do so, we see some additional options that must be configured for this field.
| Field | Description |
| Field Label | The label displayed next to the prompt when the user sees this field. |
| Placeholder (optional) | An optional placeholder that you can use to provide hints to the end user as to what to enter in this field. |
| Label Prefix (optional) | A value placed before the field. |
| Label Suffix (optional) | A value placed after the field. |
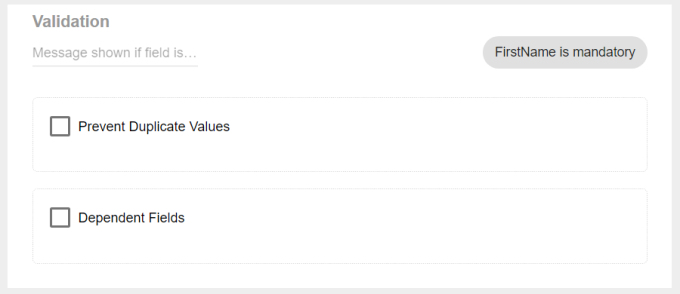
Validation of the configured fields are done with the fields shown in the table below.
| Field | Description |
| Validation | Input a message that will be shown to the user if the field is invalid. |
| Prevent Duplicate Values |
Check this option to prevent duplicate values for the configured field. Following field options become available when this option is configured.
|
| Dependent Fields | Configure fields that are hidden/shown based on the current form control value. |
| Field | Description |
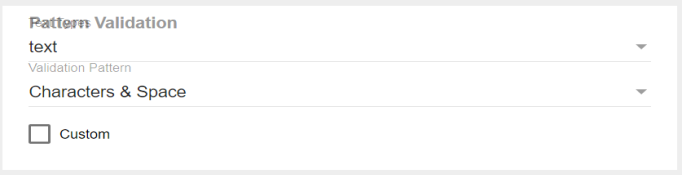
| Pattern Validation |
Allows you to use one of the out of the box validation patterns to ensure the text the user enters meets your business needs. The following options are available:
|
| Validation Pattern |
Allows you to use one of the out of the box validation patterns to ensure the text the user enters meets your business needs. The following validation options are available:
|
| Custom | If the out of box validation patterns are insufficient to your needs, you can always add a custom validation RegEx Pattern. |
Choose a Field Validation pattern of “Characters & Space”. Below is a screenshot of what this resembles.
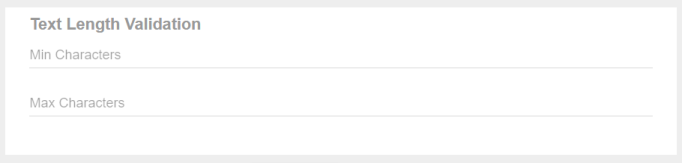
You can also set minimum and maximum character limits with the fields shown below.
| Field | Description |
| Min Characters |
This field sets the minimum number of characters for the text length.
|
| Max Characters |
This field sets the maximum number of characters for the text length. |
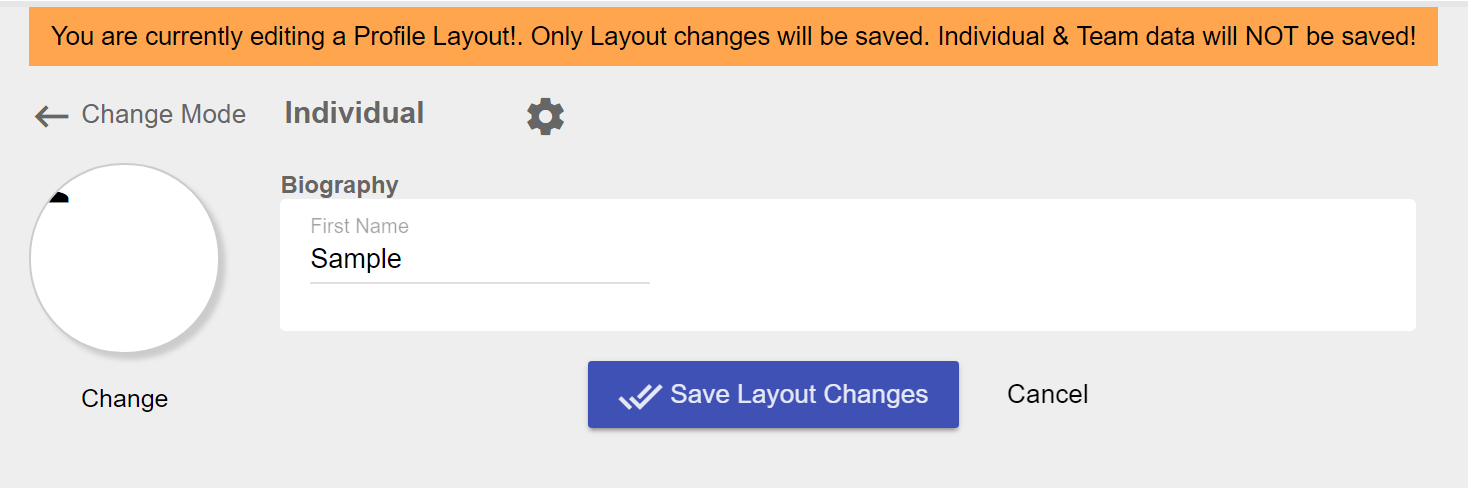
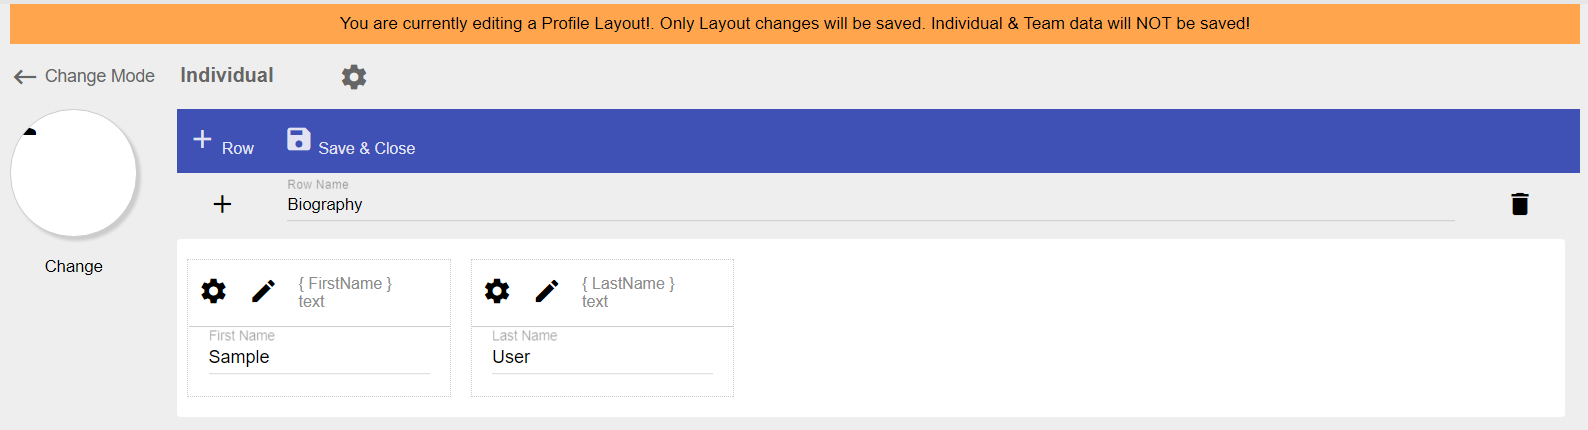
Once you’re finished, click “Save” to finalized your configuration. Now you should be presented with a screen similar to the following.

In the above screenshot we can see that the “First Name” field has been added.
Pre-population of Fields
You may have noticed, that once I saved my field, the system automatically populated the field with “Sample”. This is done because we mapped a field to “FirstName”. In doing so, the system will automatically prepopulate all fields if a value was previously saved. This help in reducing the number of steps the user must take. i.e. if the system already has the end user’s address, why make them re-enter it. Instead it is pre-populated.
Previewing Your Profile Layout
Now that we have added a field to our Profile Layout, how can I preview what the end user will see. To exit the “Layout Editing” mode. Click “Save & Close” or “Exit Layout Mode. This will hide the more advanced buttons and give you a previous of what the user will see as shown below.
The user will see a single field during the ordering process.
Saving Your Profile Layout
Now that there is a field in the profile layout, how do I save my changes?
You must remember to save your layout changes for them to persisted to the system. If you add fields without saving your changes, users will not be prompted with your new fields.
Adding Additional Fields
A form with only a single field isn’t very exciting. Adding Last Name and Address the form should make it more useful.
Remember: To enter “layout editing” mode, you must click the gear icon on the left.
Let’s add an additional field in the first row. We repeat the steps defined above, but we choose “Last Name” instead of “first Name” and you should end up with something that resembles the following.
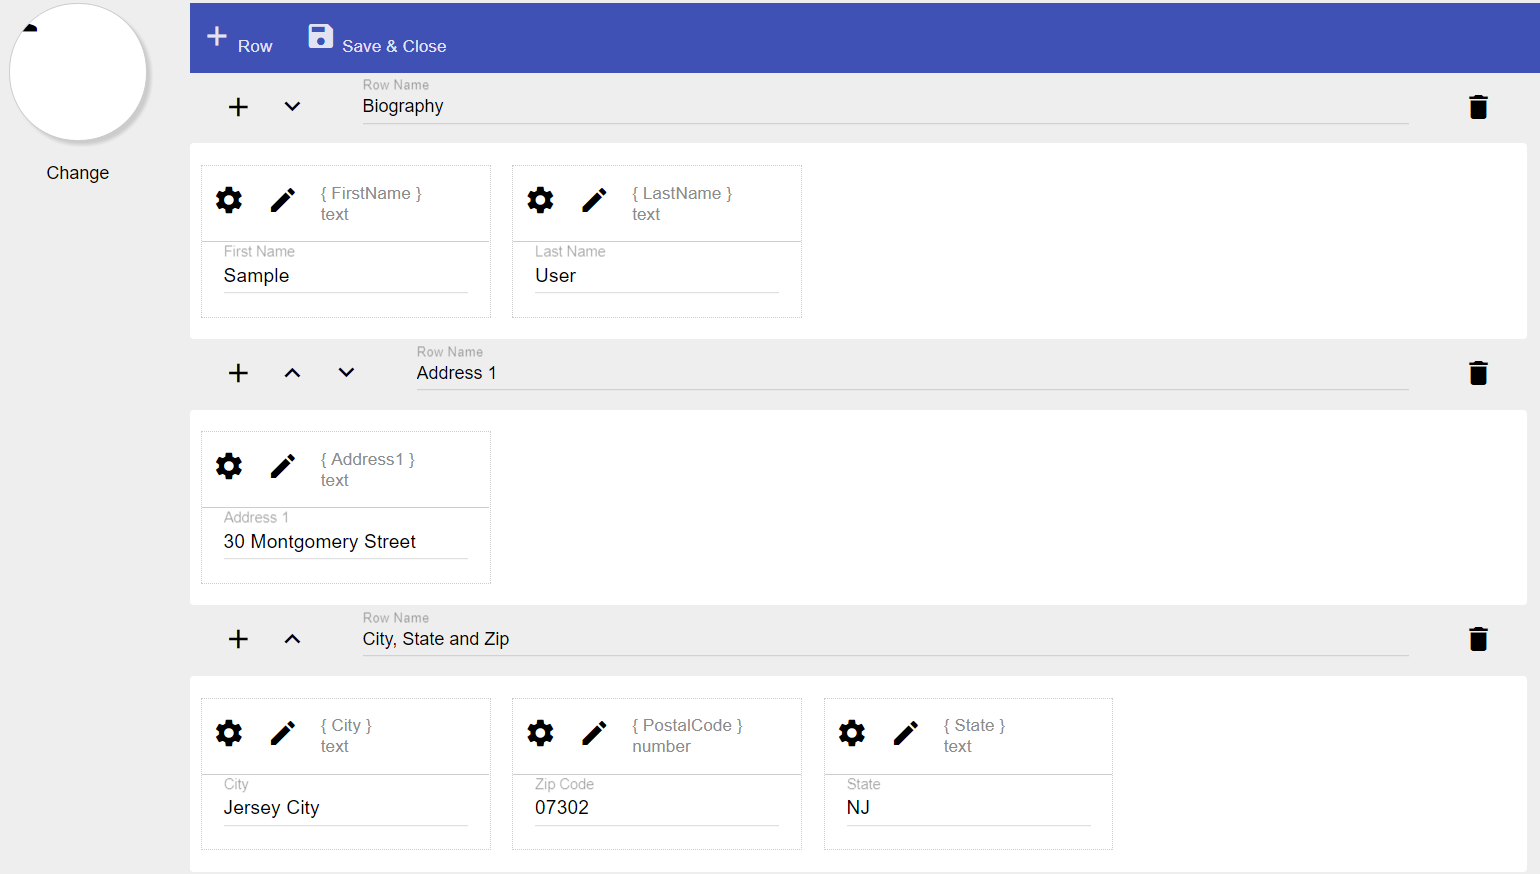
We now have two fields in our first row. Let’s add the Address fields as well.
- First click the “+Row” button to add a new row.
- Add fields for Address 1.
- Click “+ Row” button to add a new row (because Address1 is usually on a separate line than City, State Zip)
- Add 3 fields for City, State & Postal Code.
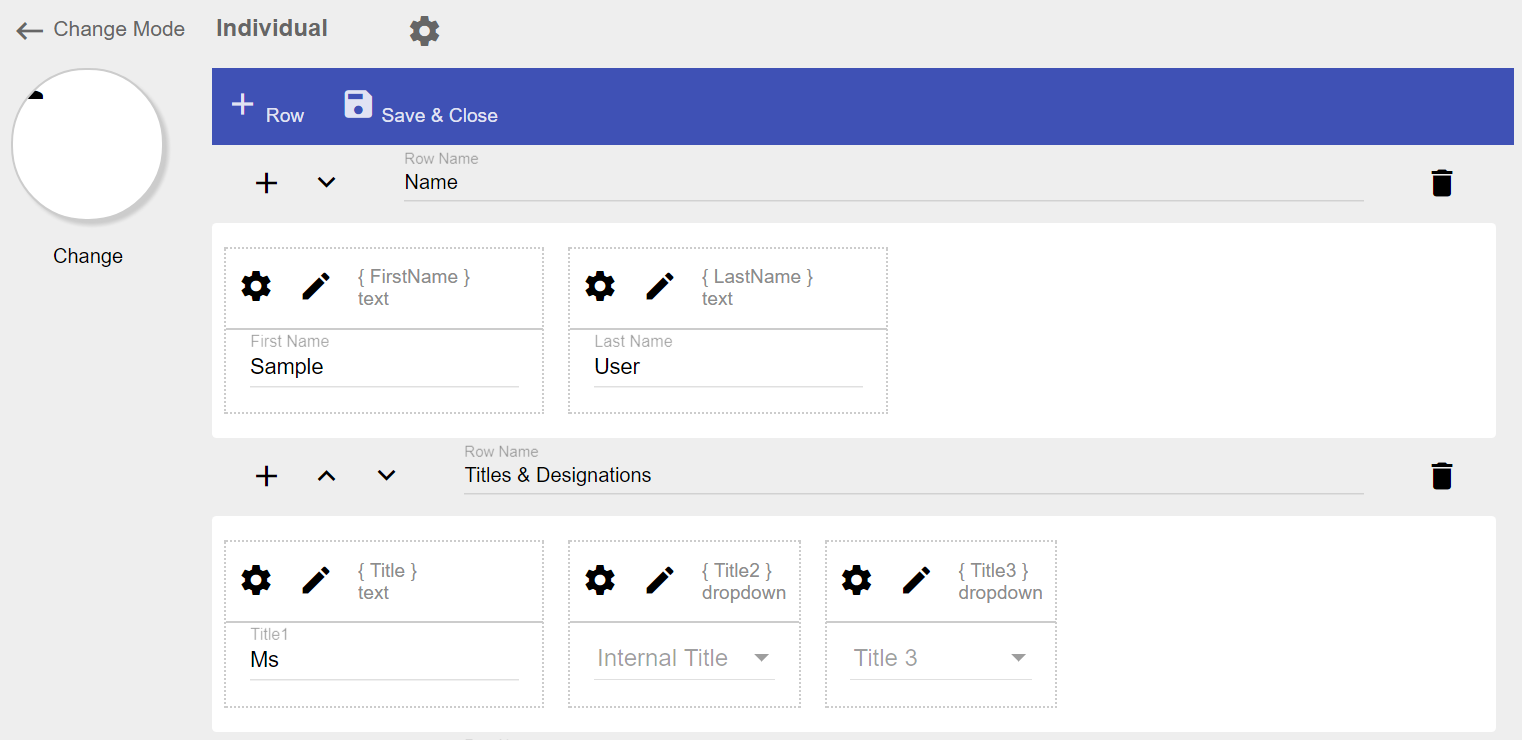
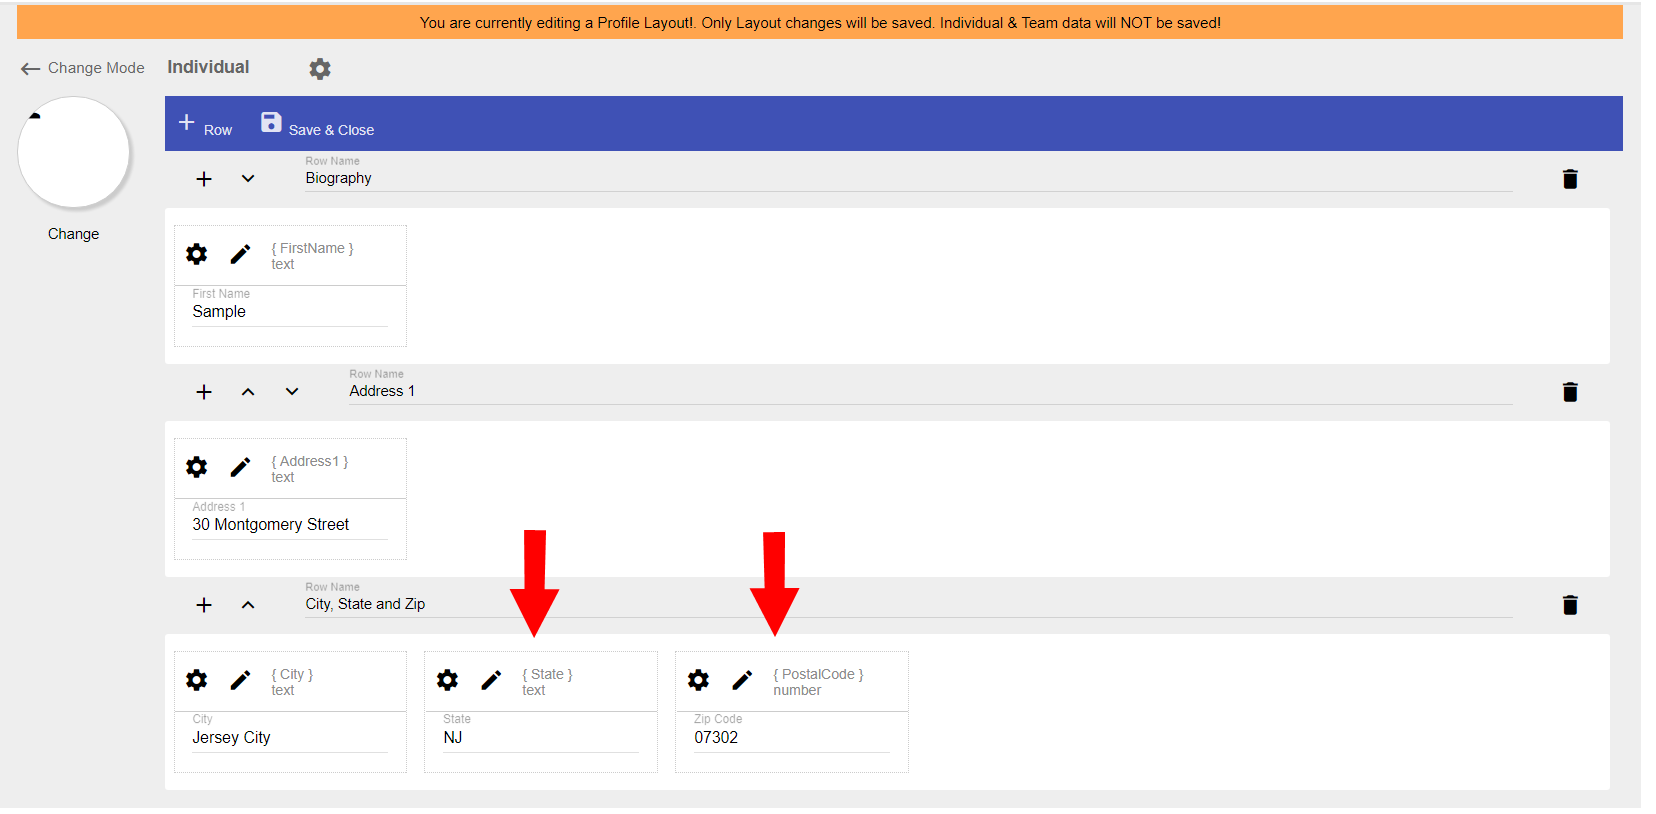
You should now have a form that looks like the following.
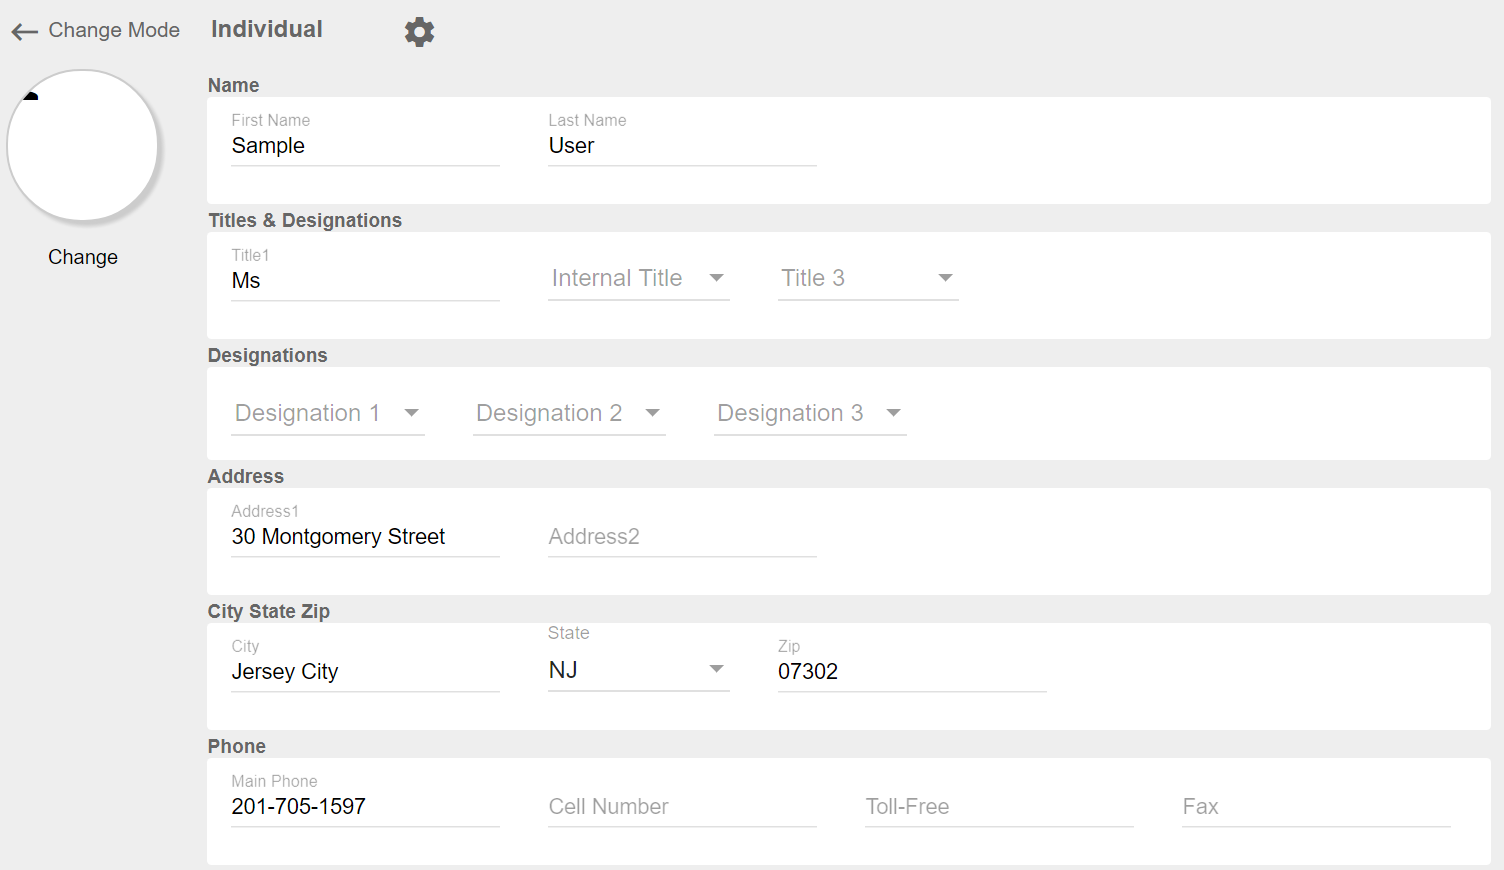
And how will this look to the end user, without all the admin controls. Click the “Gear” icon, and you should see the following.
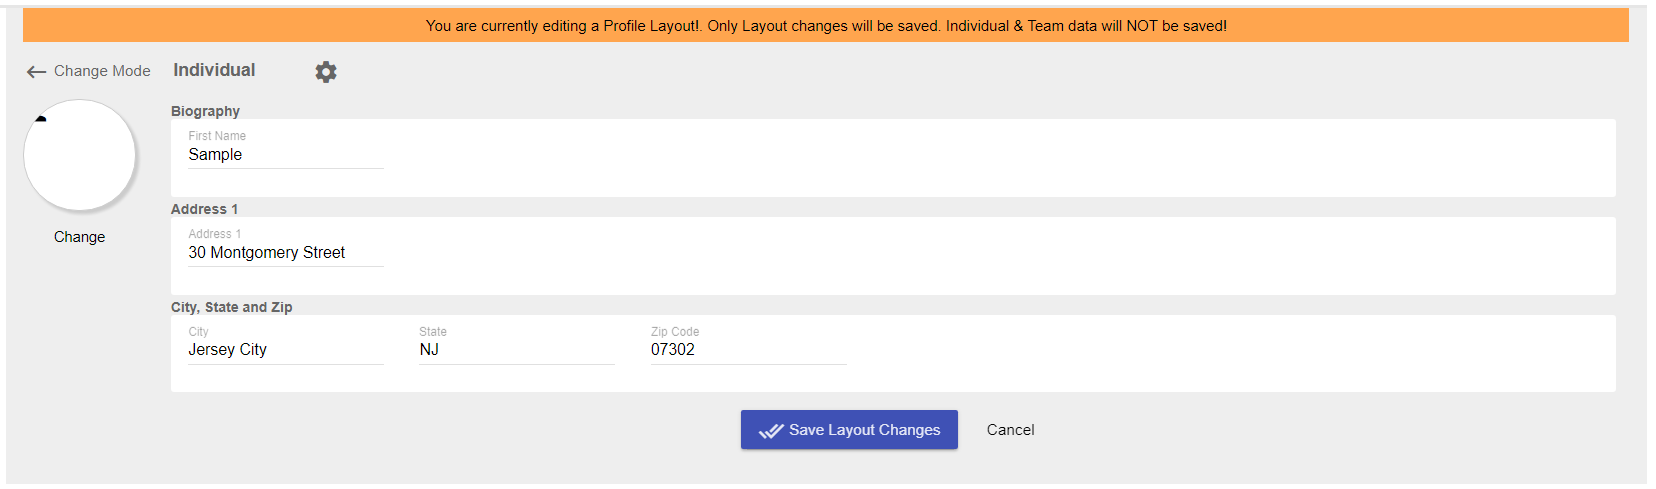
Our form is looking better now. If you look closely, you will note that the State field is displayed after the Postal Code. Following Standard Address Form design, the State should come before the Postal Code. In the next section we discuss how to change the order of fields.
How to change the order of fields in my profile layout
In the Adding additional fields section we enhanced our form to add a more complete address form. However, we noticed that the State was being displayed after the Postal code. This is something we want to change.
Field Icons
First let’s review the collection of actions icons available on each field.
- The edit icon
 allows you to edit the configuration settings of the selected field.
 - Enable "Layout Editing" mode by clicking the gear
 icon.
icon. -
Above each field you will see the following icons:
 Adds a column to the form.
 Removes a column from the form.
 Move the field to the Left by 1 position. This will only be available if the current field is not the first in the list.
 Move the field to the Left by 1 position. This will only be available if the current field is not the first in the list.
 Move the field to the row above it. This will only be available if the current field is NOT in the first row.
 Move the field to the row below it. This will only be available if the current field is NOT in the last row.
 Deletes the selected field.
Move a Field
Now that we know what the actions allow us to do, let’s move the State to appear before the Postal Code.
-
Enable “Layout Editing” mode by clicking the gear
icon. -
Find the “State” field and click
 .
.
Your form should now look correct with State appearing before Postal Code. As indicated below.

©2021 DeskNet Inc.
Proprietary and Confidential Information