Organization Nodes
Once the organization levels have been added to ContentWelder, organization nodes must be created and added to ContentWelder as well. Refer to Organization Hierarchy for additional information on Organization Nodes.
Note: If the node being created/updated is not the top-most node, and no matches are found for the specified identifier, the record is added to the bulk update report and the row is ignored.
Add Organization Node
You can manually add individual organization nodes with the + Add Organization Node button in the Organization Nodes page.
First, access the Users menu by clicking on the User Management tab then the Users menu option.

Next, click the Organization Nodes button.

Click on the +Add Organization Node button to add an organization node.

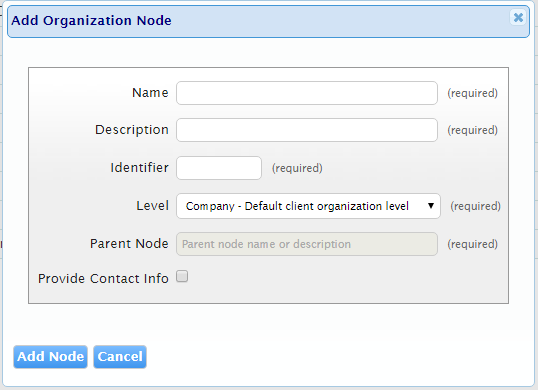
Populate the fields in the Add Organization Node dialog box. Refer to the table in the Upload OrganizationNode Import section below for a description of the fields in the Add Organization Node dialog box.
Note: Required fields must be populated with a value.

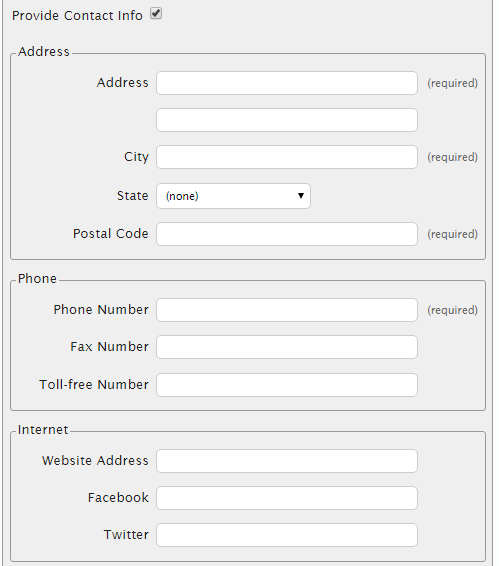
Check the Provide Contact Info check box to add contact information for the organization node. Click the Add Node button to complete the configuration of the new organization node.

Repeat the steps above to add additional organization nodes.
Upload OrganizationNode Import
With OrganizationNode Import, Administrators can upload multiple Organization Nodes that have been added to a spreadsheet in a single action.
First, a spreadsheet with fields shown in the table below must be created and populated with the organization node data. A sample of the User OrganizationNode import spreadsheet can be downloaded by clicking this link: OrganizationNodeImport.xls.
Note: Required fields must be populated with a value. Required fields are highlighted in green in the OrganizationNodeImport.xls spreadsheet.
Note: All of the columns headers detailed in the table below are required even if the row values are empty.
| Column | Description | Field Value Required? |
| Name |
The name of the organization node. |
Yes |
| Description |
The organization's node description. |
Yes |
| Identifier | This is a unique value within an organization level, it does not need to be globally unique. | Yes |
| Level |
This is the Organization Level for the organization node that was created as shown in the steps in the Add Organization Node section above. Note: Changing an organization level will result in the creation of a new Organization Node. The combination of the Level and Identifier is unique, however, you may have two Organization Nodes with the same Identifier at different levels. |
Yes |
| Parent | The Parent node value must match the Parent Level of the previously created Organization Level. | Yes |
| Address1 | The organization node's address. | No |
| Address2 | An additional address for the organization node if applicable. | No |
| City | The organization node's city. | No |
| State |
The organization node's state. |
No |
| PostalCode | The organization node's zip code. | No |
| PhoneNumber | Input the organization node's telephone number. Apply the (000) 000-0000 format. | No |
| FaxNumber | Input the organization node's fax number if applicable. | No |
| TollFreeNumber | Input the organization node's toll free number if applicable. | No |
| Website |
Input the organization node's website if applicable. |
No |
| Input the organization node's Facebook address if applicable. | No | |
| Input the organization node's Twitter address if applicable. | No |
Next, access the Organization Nodes page(refer to the Add Organization Node section) and then click the Upload OrganizationNode Import button to initiate the upload.

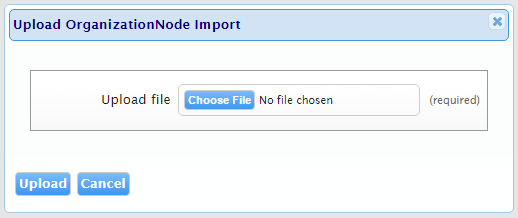
Select the excel file containing the organization node information and then click the Upload button to initiate the upload to ContentWelder.

The uploaded file will be shown in the OrganizationNode Imports screen. Verify the status of the import to ensure the upload was successful. Refer to the screen shot below for an example of a successful upload.

Return to the Organization Nodes page to view your uploaded organization nodes.

Note: If there is an upload error, review the spreadsheet and ensure that the required fields have been populated and all of the columns shown in the table above have been added to the uploaded spreadsheet.
