Create Data Instance Manually
If you chose "Enter Manually" as described in the Data Instances article, you will go through the steps defined in this article.
With this option, you will create a single data instance by manually entering the values for the data model fields.
Below is the screen-shot seen when I choose to manually enter data for the for the Data Model we created in the "Data Model article".
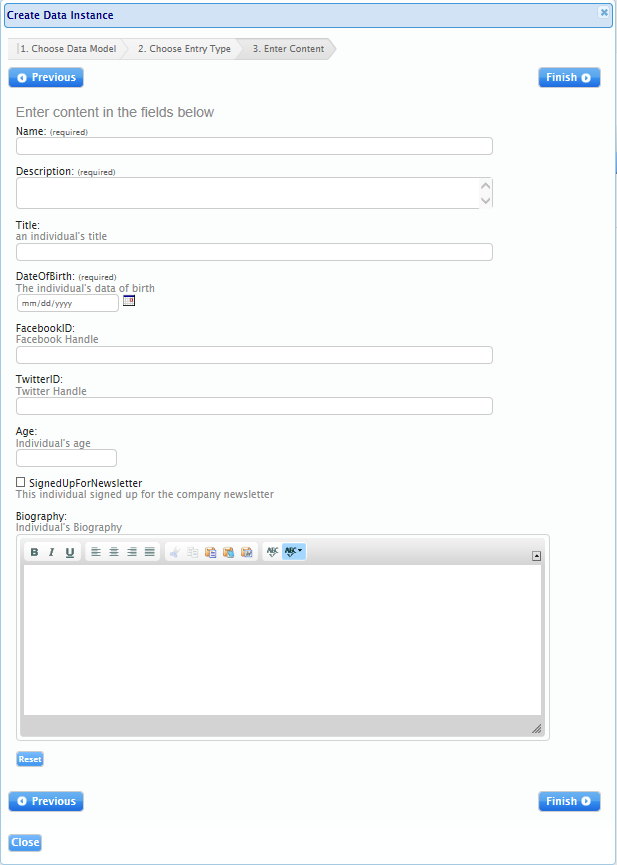
As we can seen, each of the fields I added in the "Data Model" article are displayed. but there are two fields added here that I didn't add to my Data Model. specifically:
- Name
- Description
Note: Remember, Data Models and Data Instances all come with default Name & Description field. These fields are used for searching purposes by users. so make sure to enter relevant information.
Besides these two fields the remaining fields are as we would expect.
This form was created so that you get a sense of what each data type looks like when someone is entering content for a Data Instance.
- Strings:
Title, FacebookID, TwitterID - Dates:
DateOfBirth
A build in calendar is provided for date fields. - Numbers:
Age
Only numbers are allowed - Rich Text
Biography.
Required fields
Required fields are marked as such, and will prompt the user to enter a value if the user clicks 'finish' without filling out a required field. as shown below

Once you have filled in all the fields, click "finish"
Your data instance is created and can be searched for. as shown below.


©2022 DeskNet Inc.
Proprietary and Confidential Information