Vendors
Vendors are external organizations who are responsible for producing items generated in the Global Document Portal.
ContentWelder supports having multiple vendors to enable the operations team to leverage a wide range of 3rd party tools or production facilities for the purposes of fulfilling jobs.
Access Vendors
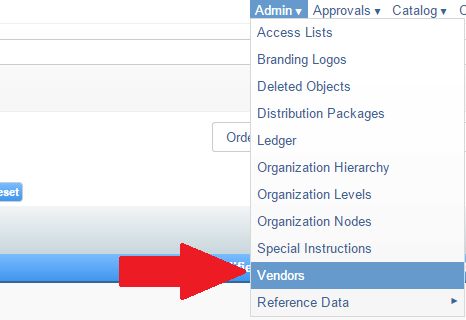
Click on the Admin then Vendors tab.
Creating and Managing Vendors
The section below describes how to create and manage vendors.
- Access the Vendor page as shown in the steps and screen shot above.
- Click on "Add Vendor" as shown below

- The Add Vendor dialog window will appear as shown below. Enter the Vendor name. The name should be easily identifiable.
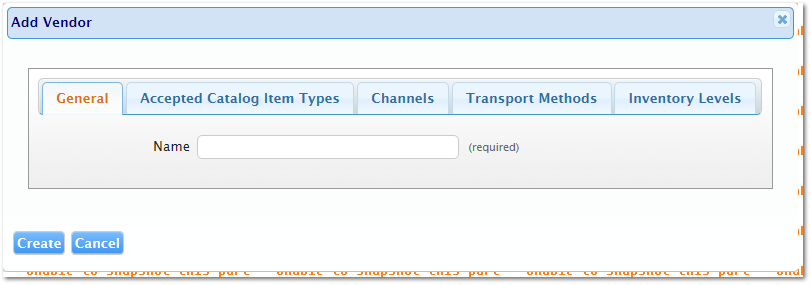
- Click the Create button.
You should now have two vendors displayed in your view.
Note: By default, ContentWelder is loaded with a "FedEx Office (FXO)" vendor.
Why Multiple Vendors are Needed
The benefits of multiple vendors are shown below:
- Company A has a multitude of documents that being produced in ContentWelder. One of which contains highly sensitive material that only accredited production organizations should be authorized to produce.
- Company A's current production partner recently lost it's accreditation meaning that these jobs need be produced at a different facility.
- While 90% of the content still goes to their default production partner, Company A needs to have these jobs produced by it's new partner "Friendly Fulfillment".
With the ability to easily create a new vendor, Company A can easily switch where jobs are transmitted without impacting the end user.
Setting what types of catalog items a vendor can produce
Now that you have a vendor, one of the first things you'll want to do is configure the types of catalog items this vendor is authorized to produce. As described in the steps above, there may be business or technical reasons for choosing when a vendor should or should not be authorized to produce certain types of catalog items.
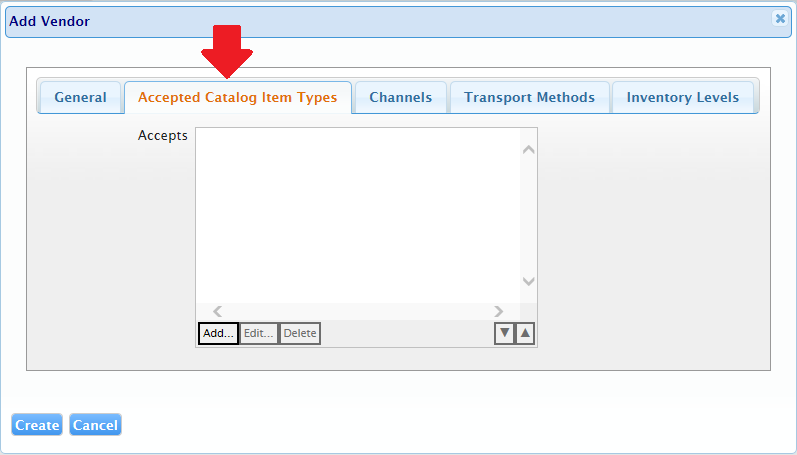
- Click the Accepted Catalog Item Types tab in the Add Vendor dialog box to add catalog item types.
- Highlight the row containing the vendor that you created to edit it.

- Click on the "Accepted Catalog Item Types" tab as shown in step 1 above.
- When a vendor is first created, the list of accepted catalog items is blank. Click the "Add" button to add a new vendor. The following dialog box will appear.
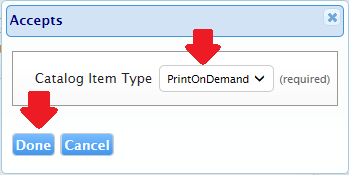
- Choose the appropriate option and click the "Done" button as seen in the screen shot above. Currently, supported catalog items types are:
- AdHoc
- Print on Demand
- Personalized
- You should now see the accepted catalog item type that you added displayed in the list of accepted catalog items.
- Click the Save button.
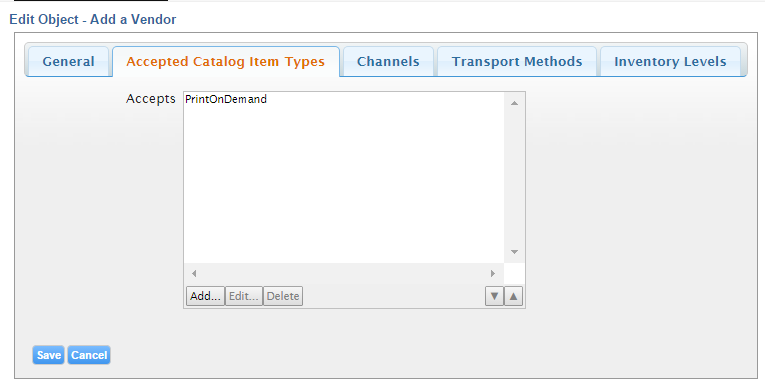
Follow the steps shown above to added additional Catalog Item types.
Setting what types of channels a vendor can handle
Channels, web, print, mobile etc., follow their industry standard meaning when it comes to what a specific vendor is equipped to handle.
Currently, the following channels are supported in ContentWelder:
- Web
To edit the channels for your vendor:
- Click on the a vendor row to start editing.

- Click on the "Channels" tab as shown below.
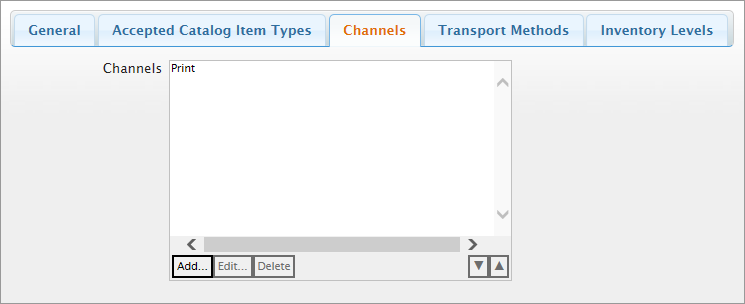
- Click the "Add" button to add a new item.
- You will be presented with a list of currently available channels. Currently, Print and Web are supported in ContentWelder.
- Select one of the options in step 4 and then click the "Done" button.
- You should now see the option you selected displayed in the list of accepted channels.
Follow the steps shown above to added additional channels.
